We work in a creative industry, so we love when a new project comes in. It takes you out of the routine and it comes as an opportunity to discover new stuff, meet new people and learn something new.
You may compare a new project to a new toy. Give the toy to the kid, and he would be eager to play with it. As there are lots of toys, there are also many types of projects. Among them, the projects where you have to build something on top of an existing foundation.
Usually, the complexity lies in consistency. You must follow previous work, understand the logic behind it and develop in a way that will not affect the existing elements. At the same time, it is important that all your additions will bring value to the project and won’t look out of place in the existing environment.
When such a project drops in, we follow a particular workflow. It helps us understand the existing foundation, as well as developing the project in the right direction. Here are the main steps we take:
01-img-blog2
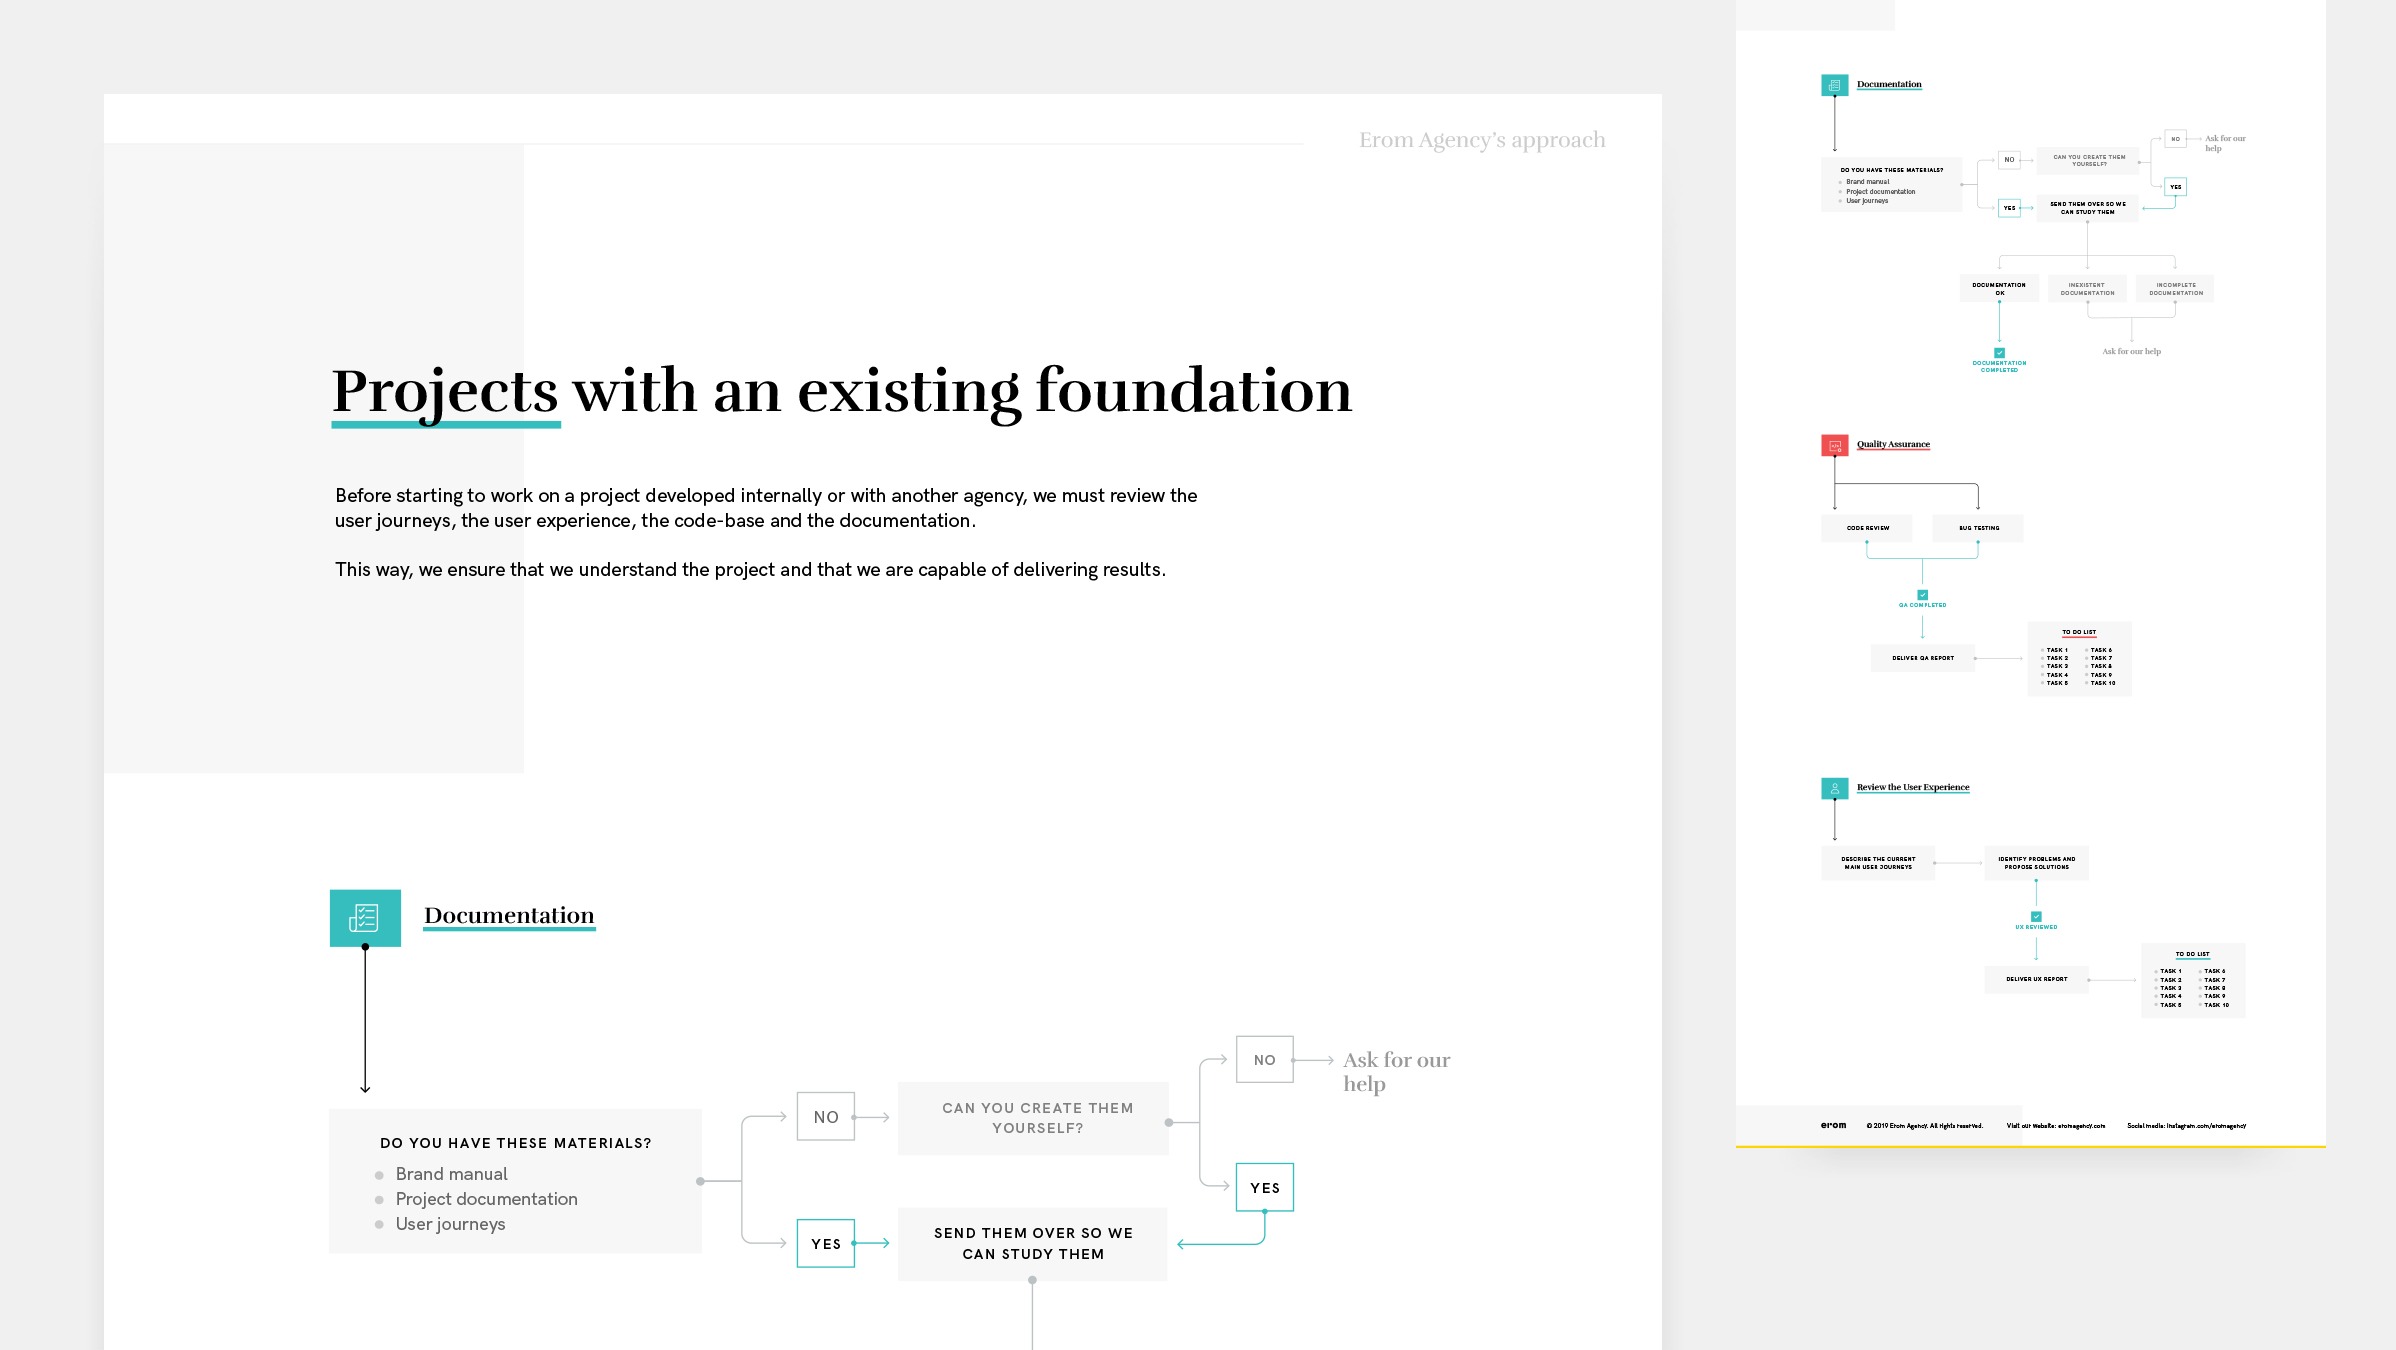
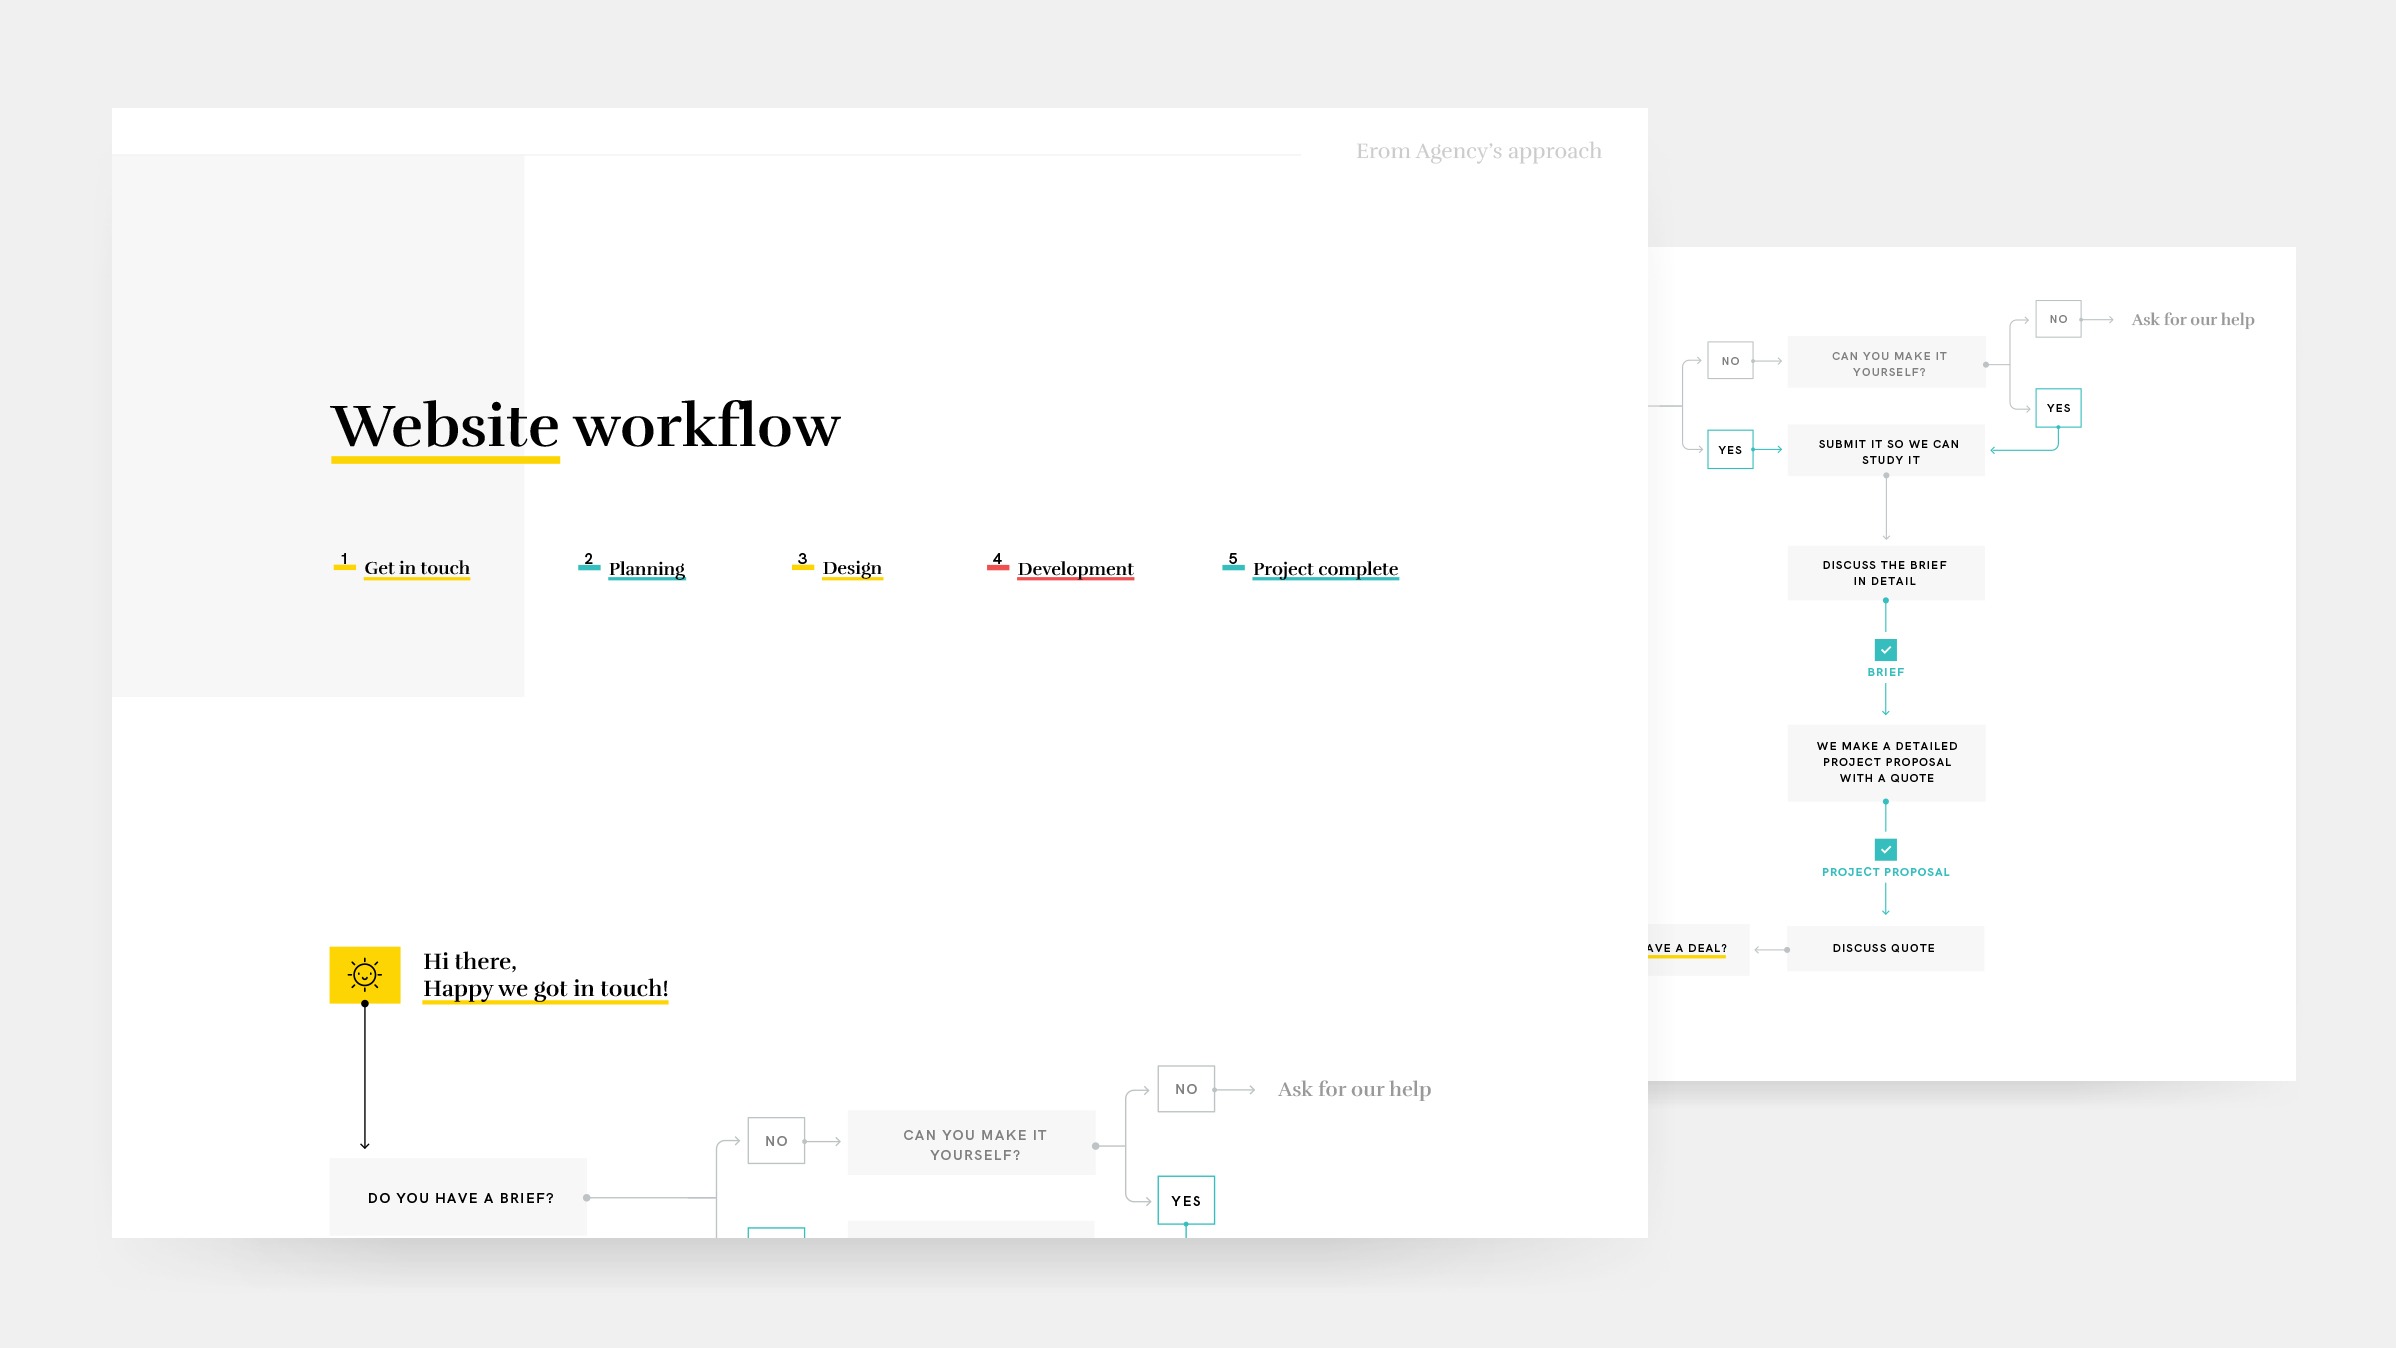
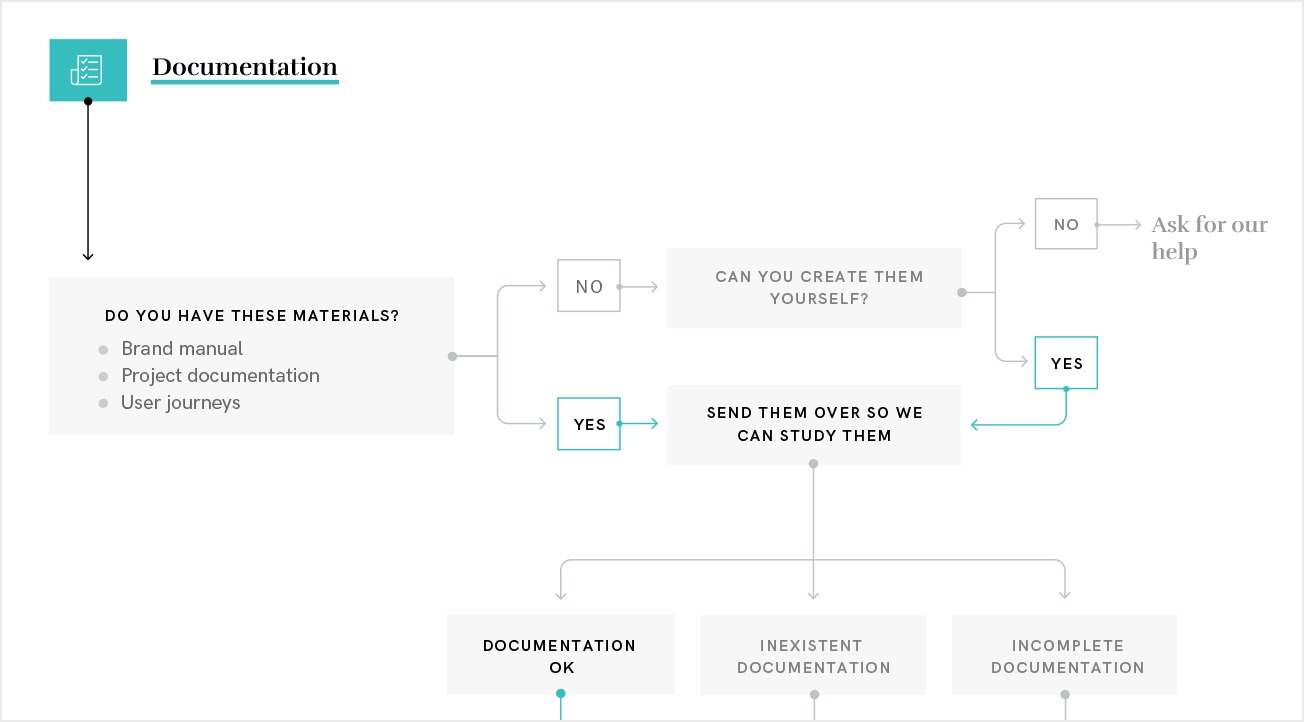
1. Documentation
- Brand manual – it offers us valuable insights into our customer’s company and it provides us with graphic materials that will come in handy when the work begins.
- Documentation – the document that served as a guideline when developing the project. It should contain goals, expected results, timelines as well as the entire project specifications.
- User journeys – a logical scheme that maps the user routes and explains the user activities on the website.
- Access to source codes – a list of all the credentials we need to start the work. Access to a GIT repository on top of this would be an excellent bonus.
These items may exist or may not. Either way, we need them before starting any non-urgent work on the project (if the site is down, we can’t wait for the user journeys…), so there are three possible routes to go further with the project:
- Everything exists and it is in pristine condition → That’s perfect, we’re ready to move on to the next step of the project.
- Some of the materials exist but in bad shape or incomplete → No worries, we’ll work a bit to fill in the gaps and improve what needs improving to bring everything up to standards.
- Nothing exists or what we get is just a mockery of materials → That’s ok, we’ll just do everything from scratch.
You might ask yourself – do we really need this? It will take time, money and it will raise lots of annoying questions like “why didn’t we asked for this before?”, “who was in charge with this?”, “were we supposed to have this?”. We understand it’s annoying, yet the short answer is “Yes, we do”. We do because, although we can see what has been done on a project, we can’t see what was the purpose of it being done. And we need to understand everything there is to know about a project if want to be able to make a difference.
02-img-blog2
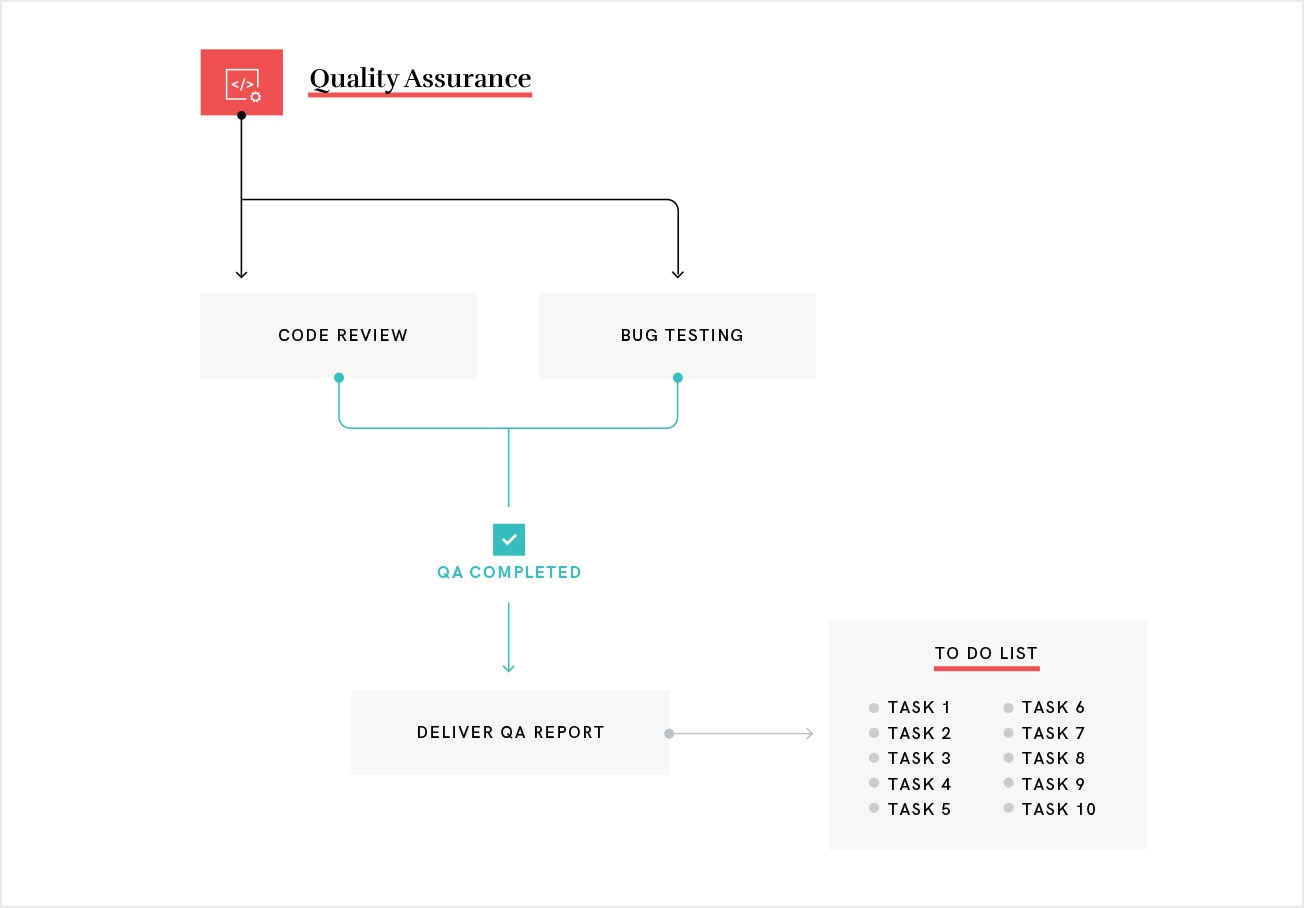
2. Quality Assurance
The next step is to run your project through our regular QA process (the one we use at the end of each milestone or before any project gets out of our door). We follow the two steps below and everything we find will be assigned with an importance level to help us keep things organised and decide which one gets fixed first:
- Code review – We review for consistency with the purpose, make sure the logic is fine and all potential implications are accounted for. We make sure it’s efficient and it adheres to standards. Everything we find will be highlighted in the code using comments and documented in a separate file that will be transferred to the “to do list”.
- Bug testing – We test both the front and the back end for logical and functional bugs. We also make sure it is rendered well in all required browsers (cross-browser testing).
03-img-blog2
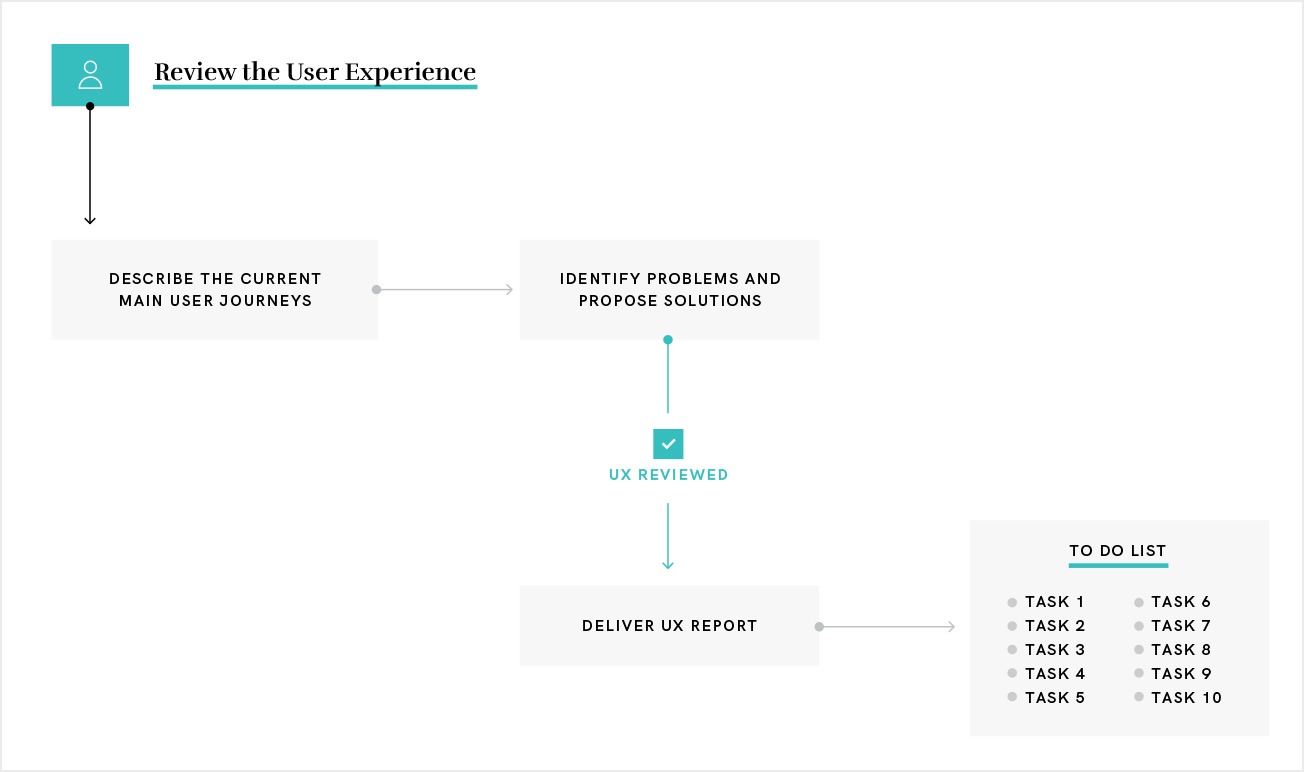
3. User Experience
The next step is reviewing the user experience (UX). This is where the user journeys come in handy.
First, we look for bottlenecks and dead-ends. Once we cover those, we start sketching the first batch of improvements.
And that’s it. This three-step workflow gets our team on the right path. It may sound complicated, but it isn’t. We have streamlined this process precisely to make it as straightforward and easy to understand as possible.
Can it turn into a lengthy and costly process? Yes, it can. But it doesn’t depend on us. It depends on the way your project was developed before.
Do I really need this? If you want to work with us, you do. Think of this as insurance, a way to make sure that if anything goes wrong, we won’t be able to come up with excuses or get to blame the previous developers. We’ve had our “zero-moment” where everything was laid down on the table: where we are, where we’re going, what’s to be done to get things in good shape. Now it’s entirely up to us to do things properly.
If you’re not convinced, try to see things from our perspective – most of the time, if the relationship with the current developers works well, you stick with them. If you’re looking for alternatives, things are usually not that great. And ask yourself, why should we stick our reputation, blind sighted, on something we didn’t build ourselves? We won’t. We must assess the situation, make sure we can actually change things for the better and only after taking on the challenge.
What if you decide not to work with us? You have nothing to lose. Yes, you paid for the assessment, but here is what you get for the money:
- Full project specifications
- Code assessment with prioritised to do list
- Bug testing with a prioritised to-do list
- UX review with a prioritised list of improvements
- If you decide to work with someone else, you just have to give them the materials we produced and after a short assessment of their own, they should be good to start.
In short
Starting work on an existing project is a tough nut to crack. The best approach is to take a step back and thoroughly assess the situation. Yes, it’s annoying. Yes, it takes time and yes, it costs money. But the alternative is to work blindfolded and when (not if) things break you’ll have no documentation to turn to and no idea where to start. Bad call.
In our experience, proper documentation pays for itself. You’ll be able to think ahead, identify and solve potential problems before anything becomes urgent. It improves the efficiency of the development team and makes it easier to write specifications for further development.
Here’s the graphical scheme of any project's milestones, have a look and see how we approach each phase.